
Uploading to Amazon S3
The Consultant Toolkit can upload the results to your Amazon S3 bucket automatically. I’ll assume you already have an Amazon Web Services account.
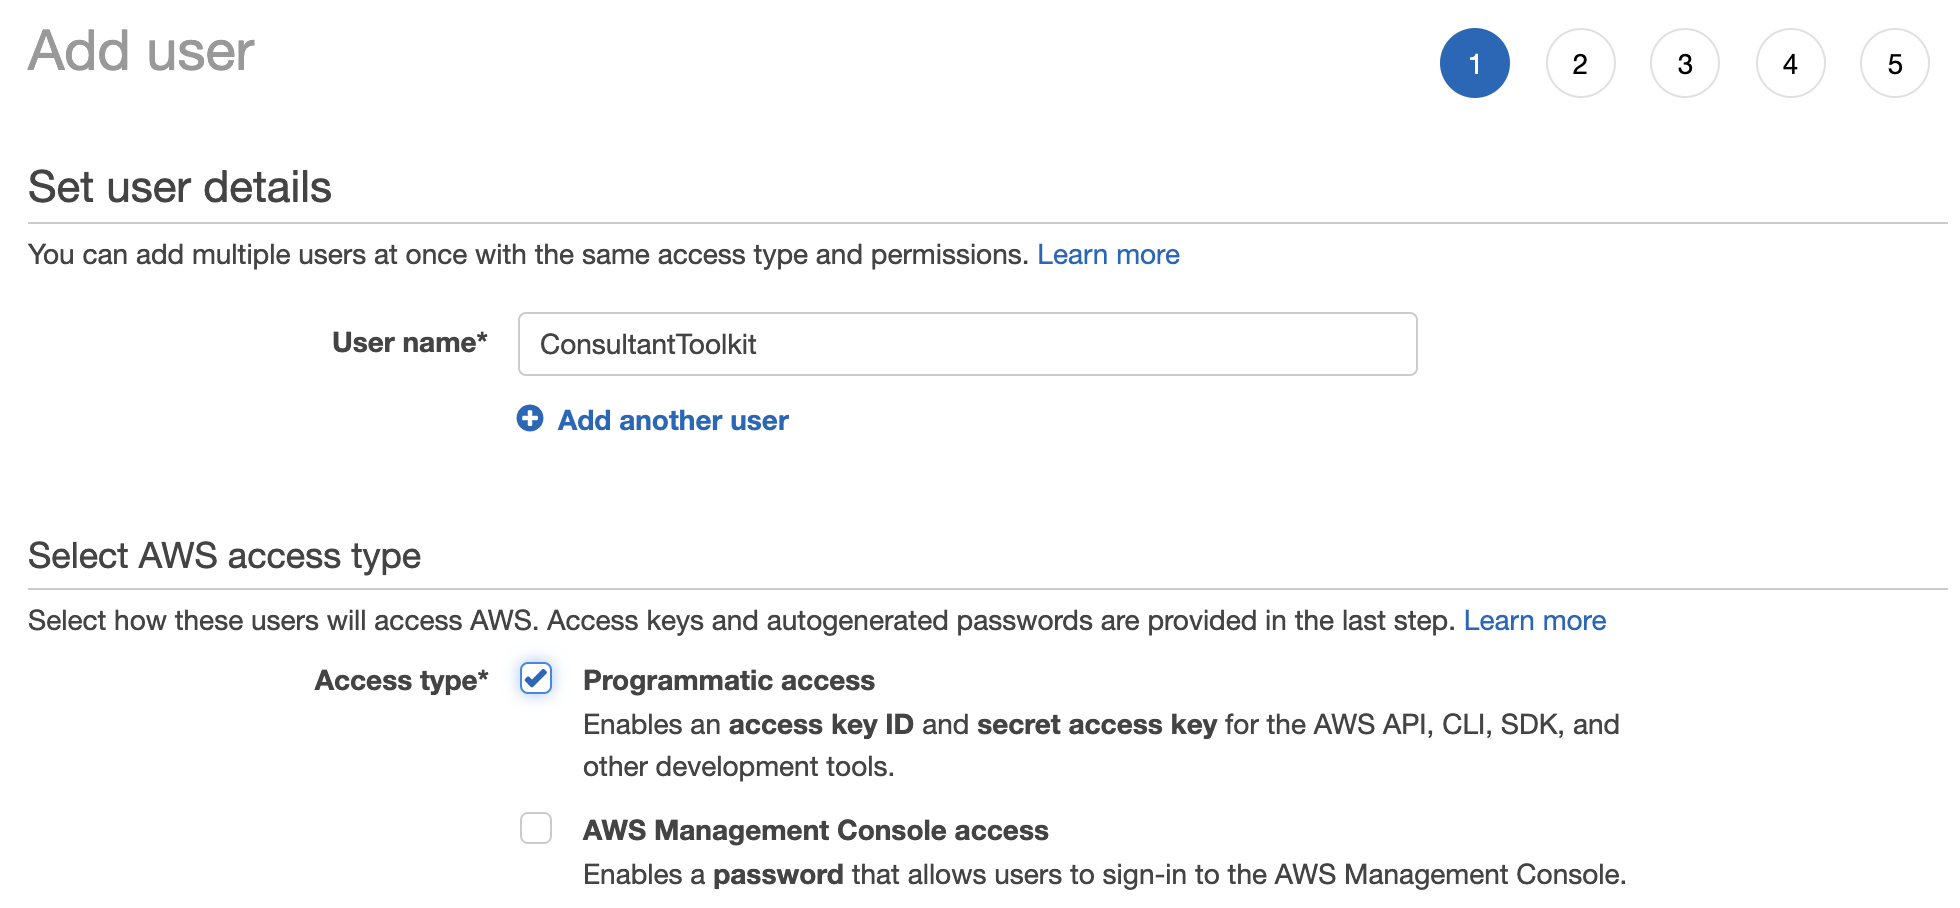
1. Create an AWS user.
Log into your AWS portal, click on your account name at the top right, and click My Security Credentials, Users. Add a user, and choose Programmatic Access:
You can skip groups and policies for this simple example. If you’d like to use groups or policies for best practices security permissions, you’re absolutely welcome to do so – but that’s left as an exercise for the reader, since it’ll vary so much by company standards.
At the end of the wizard, you’ll get an access key ID and secret access key. These are like a username and password: save these, because you’ll use them to configure the Consultant Toolkit.
Go into Users, click on the newly created user, and copy the User ARN. You’ll need that for the permissions.
2. Create an S3 bucket to store the files.
Go to the Amazon S3 console and click the Create Bucket button. You can choose any bucket name (like sql-metrics, but just stick to root buckets (not subfolders) with alphanumeric names to keep things simple) and any region. You probably want to choose default server-side encryption so that Amazon will encrypt your data at rest. For permissions, choose “block all public access.”
After the bucket is created, click on the bucket, then Permissions, Bucket Policy.
Open a new browser window with the AWS Policy Generator to build a permissions policy string that you’ll apply to the S3 bucket:
- Type of policy: S3 bucket policy
- Effect: allow
- Principal: (the User ARN you copied from step 1, which will start with arn:aws:iam::)
- AWS Service: S3
- Actions: PutObject (we only want to give it the ability to upload files, not see other peoples’ files or list them)
- Amazon Resource Name: use this, but replace your bucket’s name:
arn:aws:s3:::yourbucketname/* - For example, if my bucket was sql-server-metrics:
arn:aws:s3:::sql-server-metrics/* - Click Add Statement, then Generate Policy. Your policy should look something like this:
|
1 2 3 4 5 6 7 8 9 10 11 12 13 14 15 16 17 18 19 |
{ "Id": "Policy1495981680273", "Version": "2012-10-17", "Statement": [ { "Sid": "Stmt1495981517155", "Action": [ "s3:PutObject" ], "Effect": "Allow", "Resource": "arn:aws:s3:::sql-server-metrics/*", "Principal": { "AWS": [ "arn:aws:iam::123456789012:user/ConsultantToolkit" ] } } ] } |
Back over on your bucket window where you clicked Permissions, Bucket Policy, paste your newly generated policy, and click Save.
3. Configure the Consultant Toolkit.
Edit the .dll.config file and fill these in inside the double quotes:
- S3BucketName – the name you chose, like sql-server-metrics in my above example.
- AWSRegion – the short name for the region you picked for your bucket, like:
- US East N. VA: us-east-1
- US East Ohio: us-east-2
- US West N. CA: us-west-1
- US West Oregon: us-west-2
- See the AWS documentation for the full list
- AWSAccessKey and AWSSecretKey – it’s safe to distribute these because this user you created only has access to upload files, not list them or read them.
- UploadToS3 – set to “true” if you want the app to automatically upload to S3 every time without the users having to specify –upload at the command line.
- DeepDive – set to “true” if you always want to run the full set of deep dive queries without the users having to specify –deepdive at the command line.
Now run the app to test it, and use the –upload switch at the command line. If it all went well, you’ll see something like this:

4. Use the power of automation.
Because S3 is such a common building block, there are so many ways you can make magical things happen as new files land in your S3 bucket. Here are some of my favorites:
- Use Zapier triggers to post notifications to Slack or save the file elsewhere
- Use AWS lifecycle policies to automatically delete files after 2 weeks
- As files arrive, post a message to SQS (the Amazon queueing system), which then lets you trigger Lambda code to process the file (unzip it, perform an ETL process with the spreadsheet, etc)