In my recent post about how I use OBS for training classes & webcasts, I mentioned that to keep things lively, you wanna have a variety of scenes that you can switch between to keep the viewer engaged. Imagine a TV show or sporting event that only used one camera angle and screen layout for 30-60 minutes on end: you’d be bored out of your gourd, and you’d tune out.
 For OBS, that means using scenes. I’m going to give you a high-level overview of the scenes I use, but for an even more technical post, check out Suz Hinton’s live coding setup – she’s Noopkat on Twitch.
When I first started out, I used an off-the-shelf set of scenes. After streaming for a few weeks, I made notes of what I wanted in my scenes and what I didn’t, and watched a bunch of streams in the Science & Technology category for inspiration. Armed with that knowledge, I hired szvoreny from the Fiverr stream designers to make a custom set of scene overlays. He does awesome work and I’d recommend him highly, but be patient – lots of folks are hiring designers for custom streams right now, and good stuff takes time. Expect a 1-2 week turnaround despite Fiverr’s promise of 3-4 days.
Starting Scene
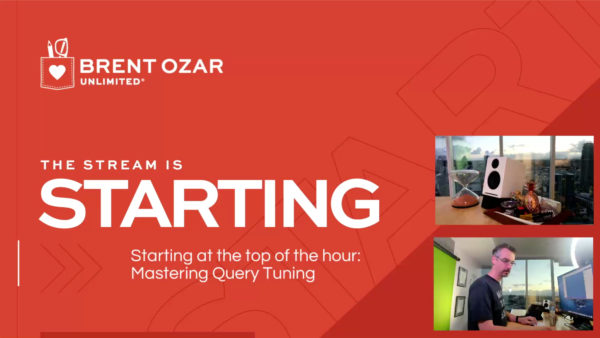
I start streaming with this scene about 5 minutes before I go live on camera. People get notifications when their followed streamers are going live, and I want them to have a few minutes to get the browser open and make some popcorn. This scene shows what’s about to start and when, plus feeds from cameras 2 & 3 – more on their placement in a minute:
I type in the “starting at the top of the hour” manually before I go live. At some point later, I’d like a little more automated solution that pulls stuff from a text file with my upcoming calendar, but baby steps.
Live Scene
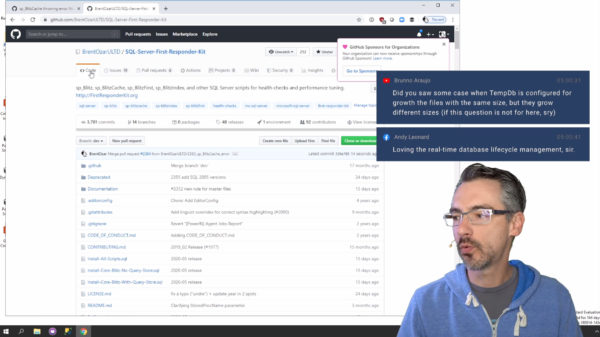
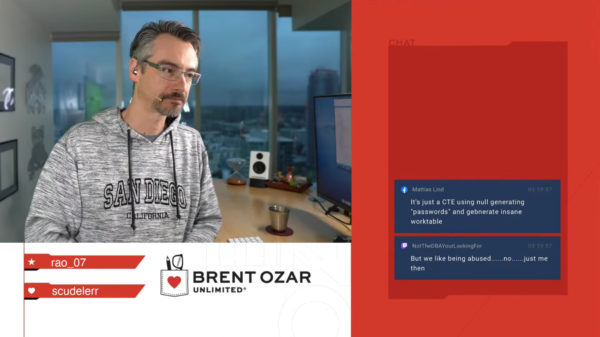
When gamers stream, they have an overlay that shows their game in a window, plus their webcam in a window, plus their recent followers, subscribers, etc. I take a minimal approach instead: I just show my desktop, overlay my webcam on top of it, and that’s it for permanent stuff. Here’s what it looks like when I’m working in Github, for example:
Comments automatically pop up above my head and disappear after 15 seconds. Note that you’re seeing live comments from multiple sources in that screenshot, both YouTube and Facebook. Like I mentioned in my OBS post, I use Restream to simultaneously stream to Twitch, YouTube, and Facebook, and Restream Chat centralizes all of the discussion. Everybody feels like they’re participating regardless of where they’re leaving comments, and all of the comments show up onscreen, live, in the same format.
I’m not actually sharing my whole desktop – I’m only showing a 1920×1080 portion of a 4K monitor. This means I can use the sides & bottom for things I need while I’m streaming. For example, when I streamed How to Think Like the Engine All-Demo Edition, I had my presentation notes on the left, and the Restream Chat window on the right so I can see what people are saying:

I run OBS on monitor 2 (the smaller right side 1080p one) so I can monitor what’s going out to the audience just in case something goes horribly awry.
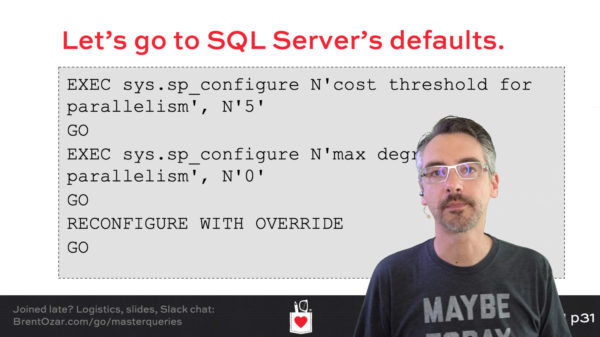
When I want to show PowerPoint, I have a second Live Scene that shares monitor 2 instead, and also uses a bigger picture of me since I don’t need as much space for demos, and I often step to the side to point stuff out onscreen like some kind of weather-person, hahaha:
This lets me use Monitor 1 for my PowerPoint presenter view, so I can still see what slides are coming up next.
Camera 2 Chat Scene
From time to time, when I want to discuss something at length or when a particularly good question comes in, I switch to this scene showing the chat, most recent subscriber & follower, and my camera 2:
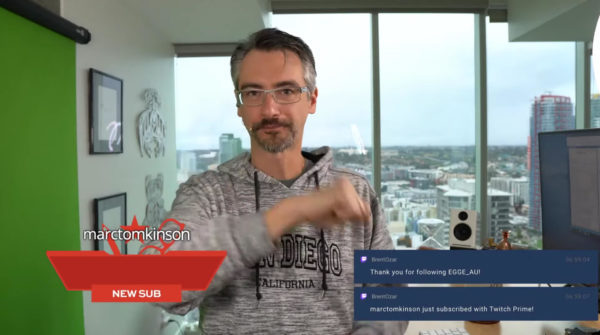
Or this scene, which shows my camera 2 fullscreen – and in this example, Marc Tomkinson just subscribed, so it’s showing a thank-you animation as soon as he subscribes, but then it disappears a few seconds later:
This camera-2 setup feels like a much more intimate atmosphere with the audience, just you and me, and it’s also more three dimensional since I’m not a floating character standing in front of the demos. It gives the audience a feel for what my office is like.
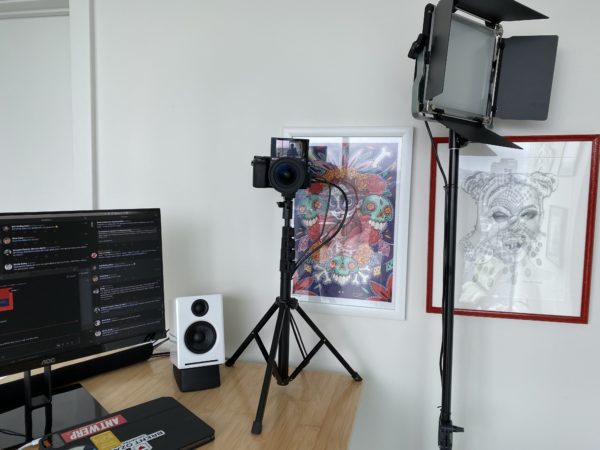
Camera 2 is another Sony A6100 on the side of my desk, plugged into my Blackmagic Design DeckLink Quad HDMI card:
It looks tilted just because of where I’m standing. The camera is right in front of a @ChrissieZullo (Instagram – store) print that a friend & client gave me that I really liked a lot. I switch out different prints & drawings here. I find that when I look at a piece of art I love, especially a smiling face, I light up more.
I wouldn’t recommend putting the camera on a tripod on your desk because it’ll vibrate whenever you lean on the desk or type. As I type this, a replacement floor-standing light stand is en route that will host both the light you see and the camera. Since they’ll be mounted to the floor, they won’t be susceptible to the vibrations. I should have done that from the get-go.
Sponsor Shout-Out Scene
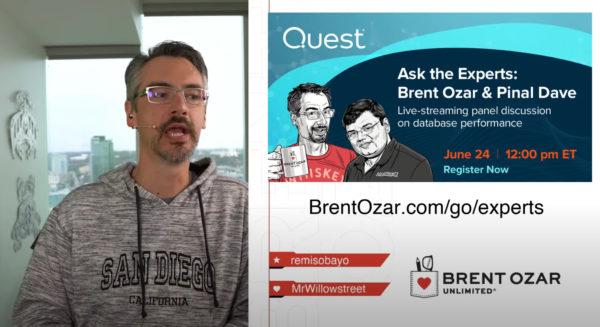
On weeks when someone is sponsoring BrentOzar.com, I take a break every so often on the webcast, stop, and do a shout-out to the sponsor. I talk about what they’re trying to promote this week, and give folks a URL to learn more, like BrentOzar.com/go/experts to register for my free webcast with Pinal Dave:
Can I just stop here for a second and say that it’s utterly, ridiculously amazing that I get to do this for a living? You can too. I wrote Rock Stars, Normal People, and You ten years ago, and I still believe wholeheartedly in that today. The whole reason I’m writing this is to give you, dear reader, all the tools you need in order to make a living doing what you love. It’s all laid out here in front of you – you just gotta have the dedication to do it. Get ‘er done.
Pause Scene
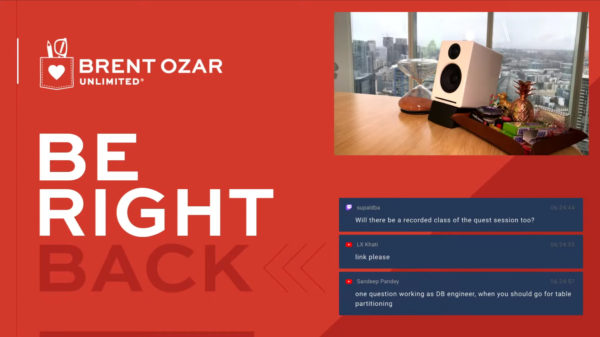
Every 45-60 minutes, I take a bio break and fire up this scene with camera 3, and the attendees can also still see each other chatting on all the different stream services too:
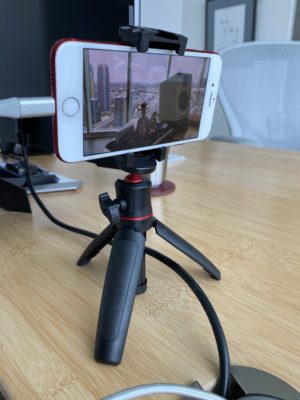
This camera’s really low-budget, though, since quality doesn’t matter much. Older iPhones show up from time to time on Woot, and I paid $140 for an iPhone 7. Using them as a camera is a little convoluted. When you plug an iPhone into an Apple, the screen of the iPhone (not the camera, mind, you but the screen) shows up as a camera source in most video apps. This was probably designed for app developers who want to record their apps for demos. However, when you use the app Full Screen Camera, the iPhone’s camera (either front or rear) takes up the whole display with no buttons, so you can use the camera as an input source.
Add a tiny tripod and a 10′ iPhone cable, and you’ve got a webcam with a built-in monitor for under $200. Is that crazy or what?
It’s kinda neat because they see the current daylight & weather in San Diego, plus they see me walking past as I leave the office to go get hydration. I move it around to different places – sometimes it shows the window, sometimes art on the wall, sometimes my desk.
When I trigger the Pause scene and I’m streaming to the public on Twitch, then 15 seconds after I trigger the Pause scene, my Elgato Stream Deck also triggers 90 seconds of ads. This lets me reset the Twitch ad clock for folks so they don’t see a pre-roll ad when they come into my channel.
Transitioning Between Scenes
I mentioned in my last streaming post about how I have keys set up on an Elgato Stream Deck for each scene, and when I hit a scene’s key, it switches over to it. It’s just a little bit more complicated than that.
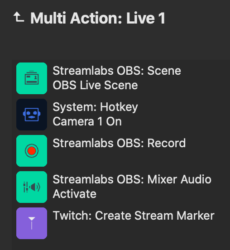 Each scene has a button, but it’s actually a multi-action button: a single button configured to perform several actions in a row. For example, when I switch to my Live 1 scene (the VM or RDP window), it:
- Switches the scene
- Turns on the right lights (and turns off the unneeded ones)
- Starts (or continues) recording in OBS
- Un-mutes my microphone
- Makes a marker in the Twitch recording (useful for folks who want to skip around to parts of the stream where things changed)
If my lights are already on, OBS is already recording, or my microphone is already unmuted, then the latter 3 actions have no effect. However, they save my bacon if I forgot to start recording or unmute my microphone before the webcast started.
The Pause scene basically does the opposite of all those actions: it opens Pretzel (podsafe music player) and hits Play, switches to the Pause scene, mutes my microphone, turns off all my lights, and stops the recording. OBS then puts the session recording in a folder on my computer. During my private training classes, the newly arrived file triggers the Vimeo app to automatically upload that module’s recording to Vimeo.com. After the day’s classes, I can then grab the URLs for each module’s videos, and update the students’ Instant Replay recordings in their training account.
If you wanna learn more about how I use the Stream Deck, I did a Twitter thread with info about each of my Stream Deck keys.
The end result is a lively, fun stream.
When you watch typical game streams on Twitch, the game itself provides a lot of visual variety and action. When you’re watching someone live code or give a presentation, it’s up to the presenter to bring a level of variety and interaction. Overlays and scenes are great tools for that goal.
Having a lively, fun stream is harder than a lively, fun in-person presentation. No doubt.
But I bet you’ll find the result totally worth it. Now that I’ve got the plumbing in place, I find this kind of online session just as fun as in-person ones because folks can be so interactive.


14 Comments. Leave new
I have a face for radio so I’ll skip the cameras and ring lights. 😀
Jeff – you’re beautiful on the inside. 😉
I appreciate you giving us a peek into how you use OBS for your presentations. The idea of OBS Studio is really interesting to me, both for recordings and possible presentation helps. I’ll have to read through this again to better absorb everything and probably while I’m playing around with the software. Not planning to go as far, but the window-in-window and quick scene switching are definitely interesting to me.
Glad you enjoyed it, Peter!
Nice writeup and setup Brent.. Amazing results!
Thanks Rob!
Hi Brent, you mentioned that the streams can be replayed on the various platforms they’re streamed to and that you set the max retention for each platform — with these live streams have you looked into a way to archive the recordings so that you own a physical copy of them or are you content to just rely on the various platforms keeping them around for you?
I really like your setup and it inspires me to want to produce some in-house training videos for my company that would be of the private variety; but I’d love to be able to record them and keep an archive of the physical recording somewhere.
Kinzleb – yeah, you can download your originals from YouTube if you want, but I’m fairly confident that YouTube will be around for a while. 😉 Plus, you can’t beat free hosting.
As someone that hops on your classes as much as I can and am working on building a consulting business, I would like to create a classes with the quality yours is. This is a long ways out for me. I like to hear about the equipment and how you use it. Thanks for sharing. Enjoying the latest updates you have made. Cool tech!
Joe – thanks sir!
Awesome write up, I’m trying OBS now. What do you use to remove the greenscreen so only your head/body appears in the video?
Thanks! It’s built into OBS – it’s called a chroma key filter.
Thank you for sharing the details of the system you have set up for your presentations. I was certain that you had put a lot of R&D into it, and I’m sure that it has evolved with you along the way.
Thanks for sharing so much with the community.
My pleasure!