
Let’s say you found an interesting repository (code project) on Github, and you wanted to make a contribution to it. Here’s how it works.
Profilin’
Did you know that Richie has a stored procedure call sp_DataProfile?
I didn’t even know he had a website until today. I wish he’d talk about this stuff more.
In case you don’t believe me: he does, and it can do some pretty cool stuff.
I mean, it could. If my instance wasn’t case sensitive.

GitHubbin’
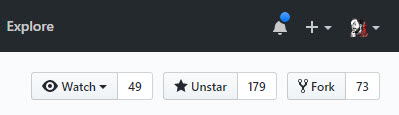
We use GitHub for our First Responder Kit repository (repo, aka code project), which is easy. I’m like, sa on the repo or whatever, so I can do whatever I want.
Working in someone else’s repo is a little bit different. Here’s how I did it, so hopefully you can follow along if you want to contribute to the FRK, or another open source project.
I assume there are others, anyway. Probably one we use.
You’ll need an account on GitHub of course.
You’ll also wanna download a GitHub client to work on stuff locally. All my screenshots are using the CURRENT_VERSION() of GitHub Desktop.
Fork: Make a Synced Copy of Someone Else’s Project
After you sign up, head on over to whatever repo you wanna work in. There’ll be a button in the top right-hand corner of the website that says “Fork.” Fork is both a noun and a verb, and when you press it, you’re going to verb it:
When you press it, you’ll get a prompt (at least I do, apparently because I have multiple personalities) asking you where you want to fork the repo. You’ll want to fork it into your own personal account because you’re working with your own changes.

Once the repo is forked to your account, that means you have your own copy of the repo, frozen at one moment in time. You can sync your copy to the main repo later, but we’ll leave that for a future discussion. Right now, you need to get to work on the changes you need to make, and the first step is to make like the Republic and…
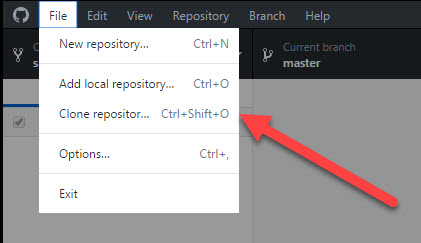
Clone: Download a Local Copy of Your Repo
Clone means make a local copy of a repo. You’d think you’d be cloning the original project, but you’re not allowed to do that unless the original author has given you permissions on their repo. (That’s not gonna happen, bucko.) Instead, you’re going to be cloning your fork.
This is where the GitHub desktop app comes in. Open it up! If this is your first time, you’ll need to sign in.
Here you can choose which repo to clone, and where to clone it.
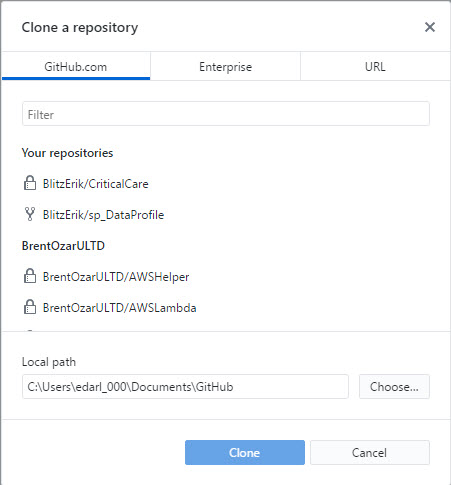
Now you’re ready to fix your developer’s laziness! There’s a URL button here. I was going to ignore it, but I can’t ignore a button. I’m not very authoritative on GitHub, but I’m gonna guess this isn’t the one you wanna use to work in someone else’s repo.
You’ll get all sorts of permissions issues when you go to create branches or make pull requests.
Avoid this button.
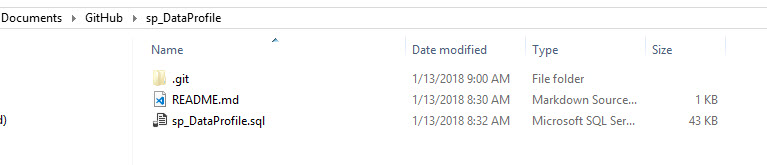
Head on over to whichever directory you stuck your forked clone in. For me, it’s the Documents folder.
Pull: Offer Your Changes to the Project
Here’s the part where you become a good person. We’re all only human, and humans make mistakes. When we make these mistakes, we open Issues for them.
If you’ve found an Issue, you should check to make sure someone else hasn’t already found it. The only thing worse than making a mistake if having 2358969865983645986 people tell you about it. This is why I avoid Twitter. The entire platform exists for people to tell each other they’re wrong.
(Brent says: this is why I use Twitter. I like telling other people they’re wrong. See, you’re wrong, Erik. You can’t evade my judgmental spirit.)

Every GitHub repo has this tab (this is the website, not the Desktop client)
Click on that button.
You’ll see Issues, but only the open ones.
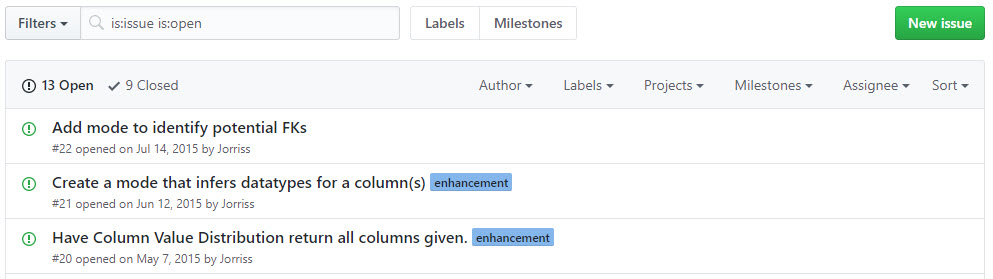
If you don’t see the issue you want to file there, you’ll wanna click on the link that says “Closed”.
There may be a closed Issue for the thing you wanna gripe about, meaning it’s already fixed in a newer version than the one you’re using.
That might just be the Dev branch, and it hasn’t been pushed out to Master yet.
If there are a lot of issues, try searching by a few of the key words for the Issue you think you’ve found.
If you don’t find it, start a new Issue.
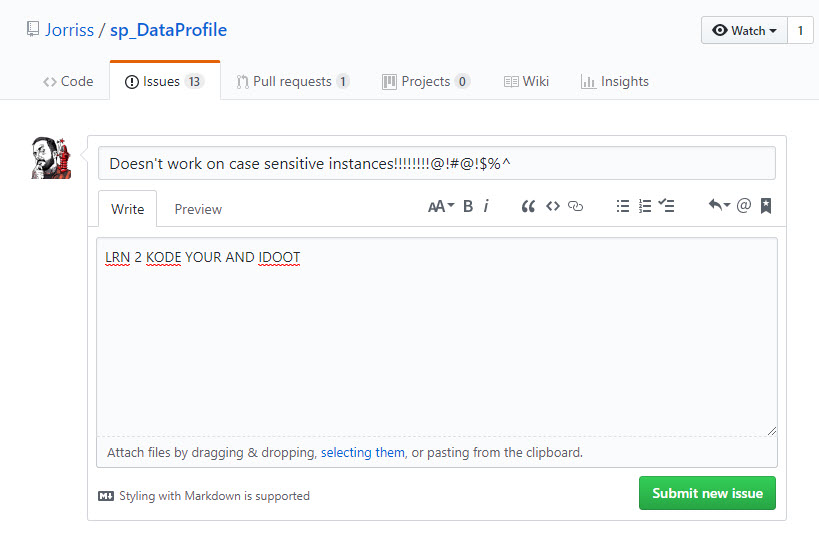
This is a terrible issue. Don’t file this issue.
Be descriptive. Post commands. Post error messages. Screenshots are worth ONE BILLION WORDS.
Is there a debug mode? An error log? Something weird about your environment? Context is everything.
We’re focusing on bugs, here. Feature requests are a whole different matter. Open source doesn’t mean “free development on demand”.
If it’s a feature you’re going to code, that’s totally cool. Just want to hear back from the owner.
In my case, I’m gonna make the fix myself, so I get to work.
When I’m done making changes and testing them, I save the file, and head back to the Desktop client to make a commit.
A commit is where you detail the changes you’ve made.
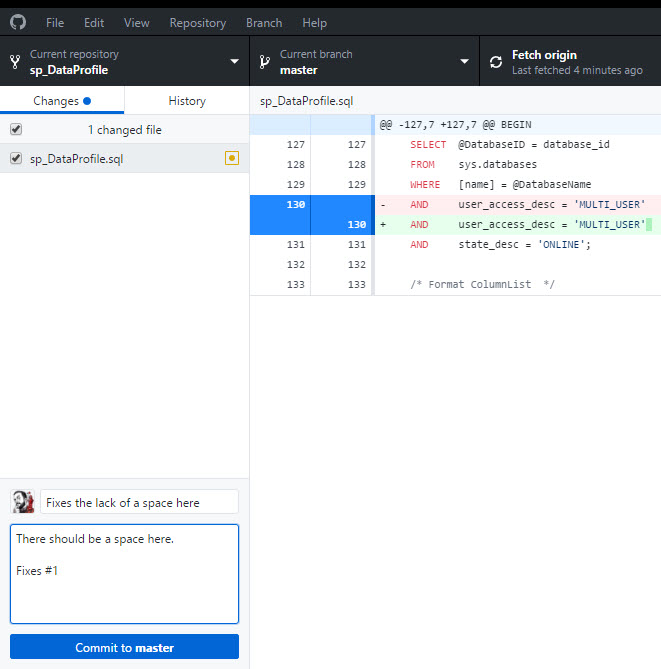
It should also show you red/green lines where you’ve made changes.
Note for Brent: there really is red and green here.
(Brent says: I hope this isn’t like the time you told me Shell sold booze by the gallon.)
Now, since this my local Clone, I’m working in the master branch. If I really wanted to work on a project long-term, I’d make my own local Dev branch too, so it would be easy to roll back any wonky code I tested out.
There’s something really important in that commit though: When you write “Fixes #x” or “Closes #x”, it’ll link the Pull Request (which we’re gonna make in a second) to the Issue you filed, or whichever issue you’re working on.
When the Pull Request gets merged, it’ll automatically close any Issues you’ve listed. This keeps the Issues section clean (especially if you’ve fixed a few things in one pass), so the Repo owner doesn’t have to go back and manually close out Issues.
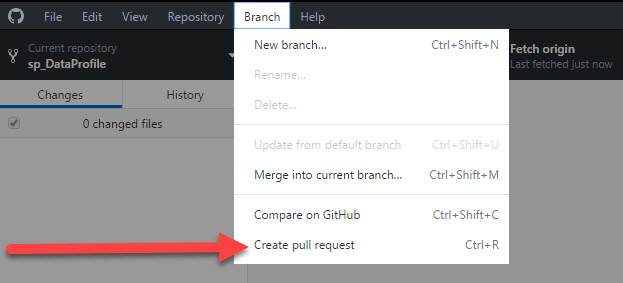
When you’re ready to show your code to the world, head into the Branch menu and hit Create pull request. Sometimes it’ll ask you to publish your code first, and that’s totally fine. It just makes your Branch public, and bases your Pull Request off that Branch.
You’ll end up on a page like this! Make sure you’re comparing to the correct Branch. The correct Branch is not the master Branch, unless there’s no other Branch.
Chances are you wanna be in Dev, but that may change if you’re working on something in another Branch of code. For instance, someone asked you for help with something in a Branch they’d been working in.

Once you’re sure you’re in the right place, and that you really wanna do this, create your Pull Request.

You should end up in this very happy place, where your Pull Request will die a long, slow death waiting to be Merged.

You are now a developer
Get a job in San Francisco and pay $4000 a month to rent a dog bed in a warehouse.
You’ve made it!
Thanks for reading!

4 Comments. Leave new
Hi Erik,
great! Thanks for the walkthrough. I use Git myself but at a very basic level (just committing into the master branch). Very helpful to see how team work on projects works.
Martin
Martin — thanks! Yeah, I read some of the other stuff people doing with it, and it’s pretty crazy, but I figured some folks might need an intro.
Thanks Erik, this is a great post. In fact, I’d say you guys are the go to place for me for lots of info, thanks again for all your hard work!
Glad to be of service, Andy.